Mt. Rainier and Lenticular Clouds - Dec. 2008 copyright: JMM
Showing posts with label Easter eggs. Show all posts

April 29, 2014

Eggsperiments 2014

This year I only did a few eggs, unlike last year's eggstravaganza of different techniques.  I found some new dyeable plastic eggs at Walmart so I went that route to see how they'd do with the dyes.  Despite my best efforts, I made a huge mess in the kitchen.


And yet I still wasn't able to dye the entire dozen in an afternoon.  They don't seem to take the PAAS kit dyes very well.  The pink one on the far left was done with 2 red PAAS tablets dissolved in just vinegar.  They don't recommend dissolving the dye tabs in water at all, or else the results will be very pastel.  The green one behind the pink was done by squirting green food colouring right on the egg.  That resulted in the deeper green shade, but it also didn't dry evenly.  The yellow & pale purple were done with gel food dye in yellow and blue.  I cut out that one egg, painted it with green acrylic paint and added the Santa.  That one on the end is dark purple acrylic paint.  One not show is painted black with a coat of red glitter paint.  It should be noted that paint takes a wicked long time to dry and requires multiple coats.  I was rapidly losing interest.

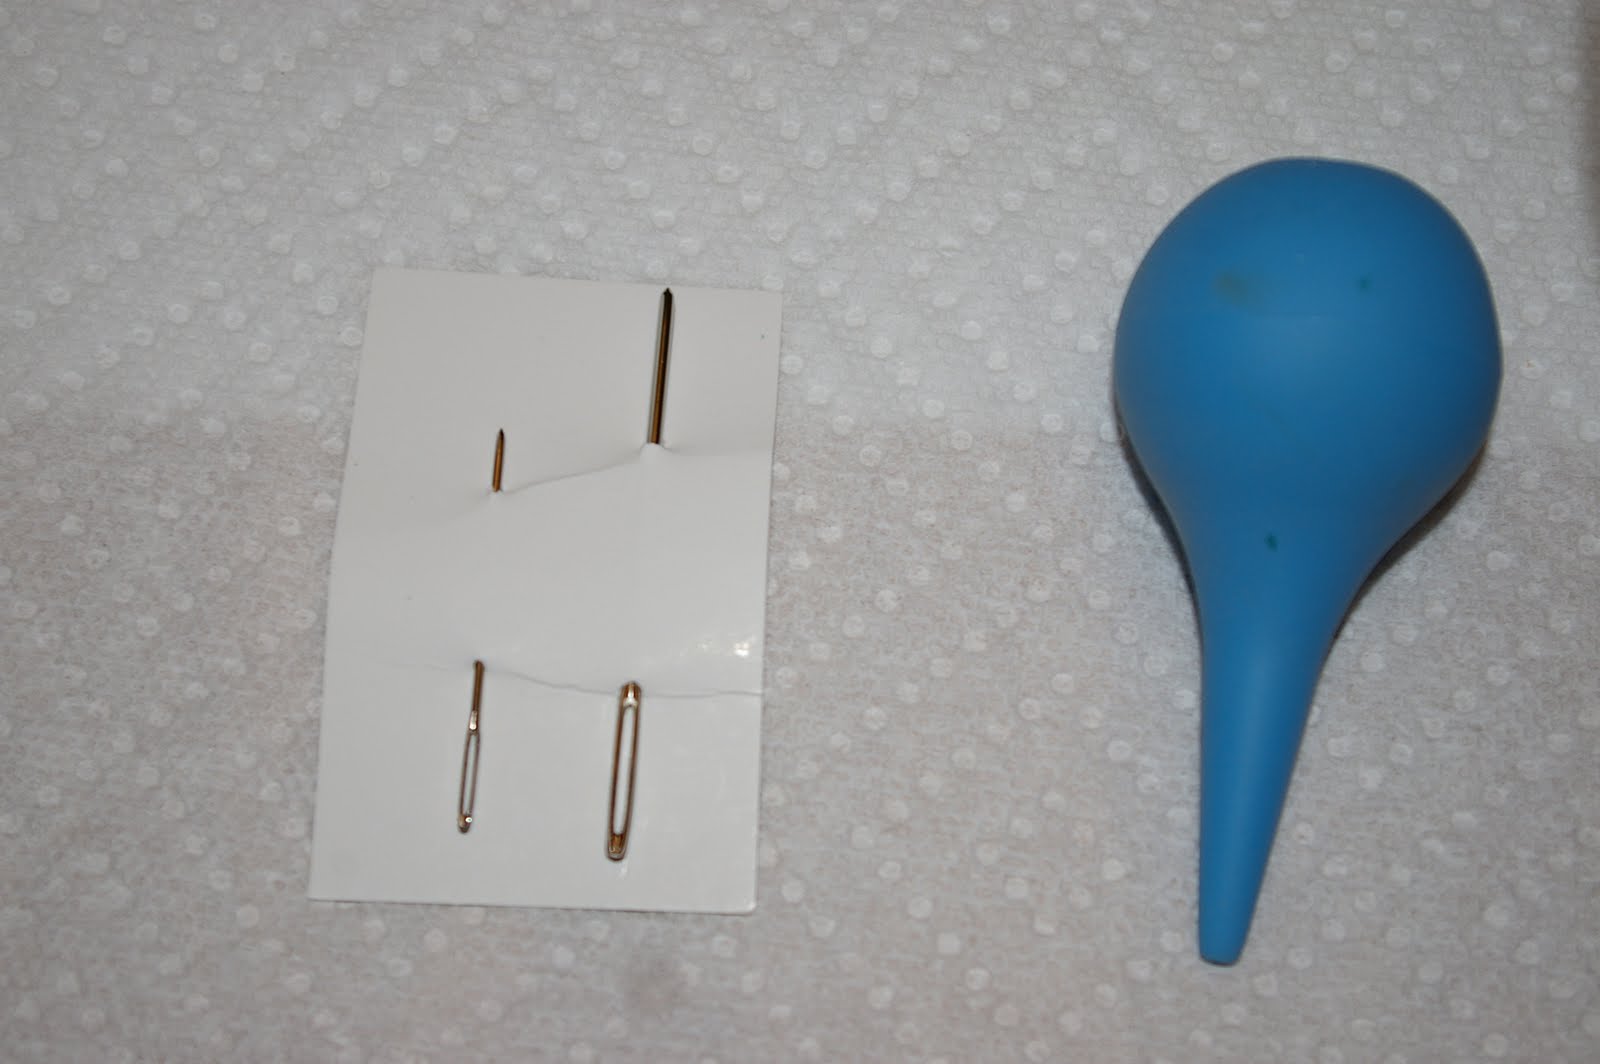
Then I broke out the drill and drew a half assed design on the egg and drilled it out.  This took awhile too because of my elbow tendonitis and the weight of the drill was making it very painful to do more than just a few holes at a time.  

Next time I'll take the time to make more even holes! 

Then I made a couple of sugar eggs that I let dry for a few days before decorating them.  The recipe for these makes enough sugar for 2 eggs.  I forgot that and realized after I coloured it blue that I had to figure out if I wanted to make 2 blue eggs and make a whole other batch for purple or what.  I decided to just throw purple dye into the blue sugar, mixed it well and it ended up coming out a nice shade.

I also decided to make the recommended royal icing which dries fast and hard.  Last year I used regular store bought icing in the can and it never truly dried all the way.  My piping skills leave much to be desired and I'd probably work out the kinks with practice.  They are pretty fun to make.

Remember the tiny pagoda I found at the flea market?  I painted it blue and went for a blue willow type design for this egg.  

And a wee chick with bunneh ears in the purple.  Those are candy flowers and candy pink pearls.


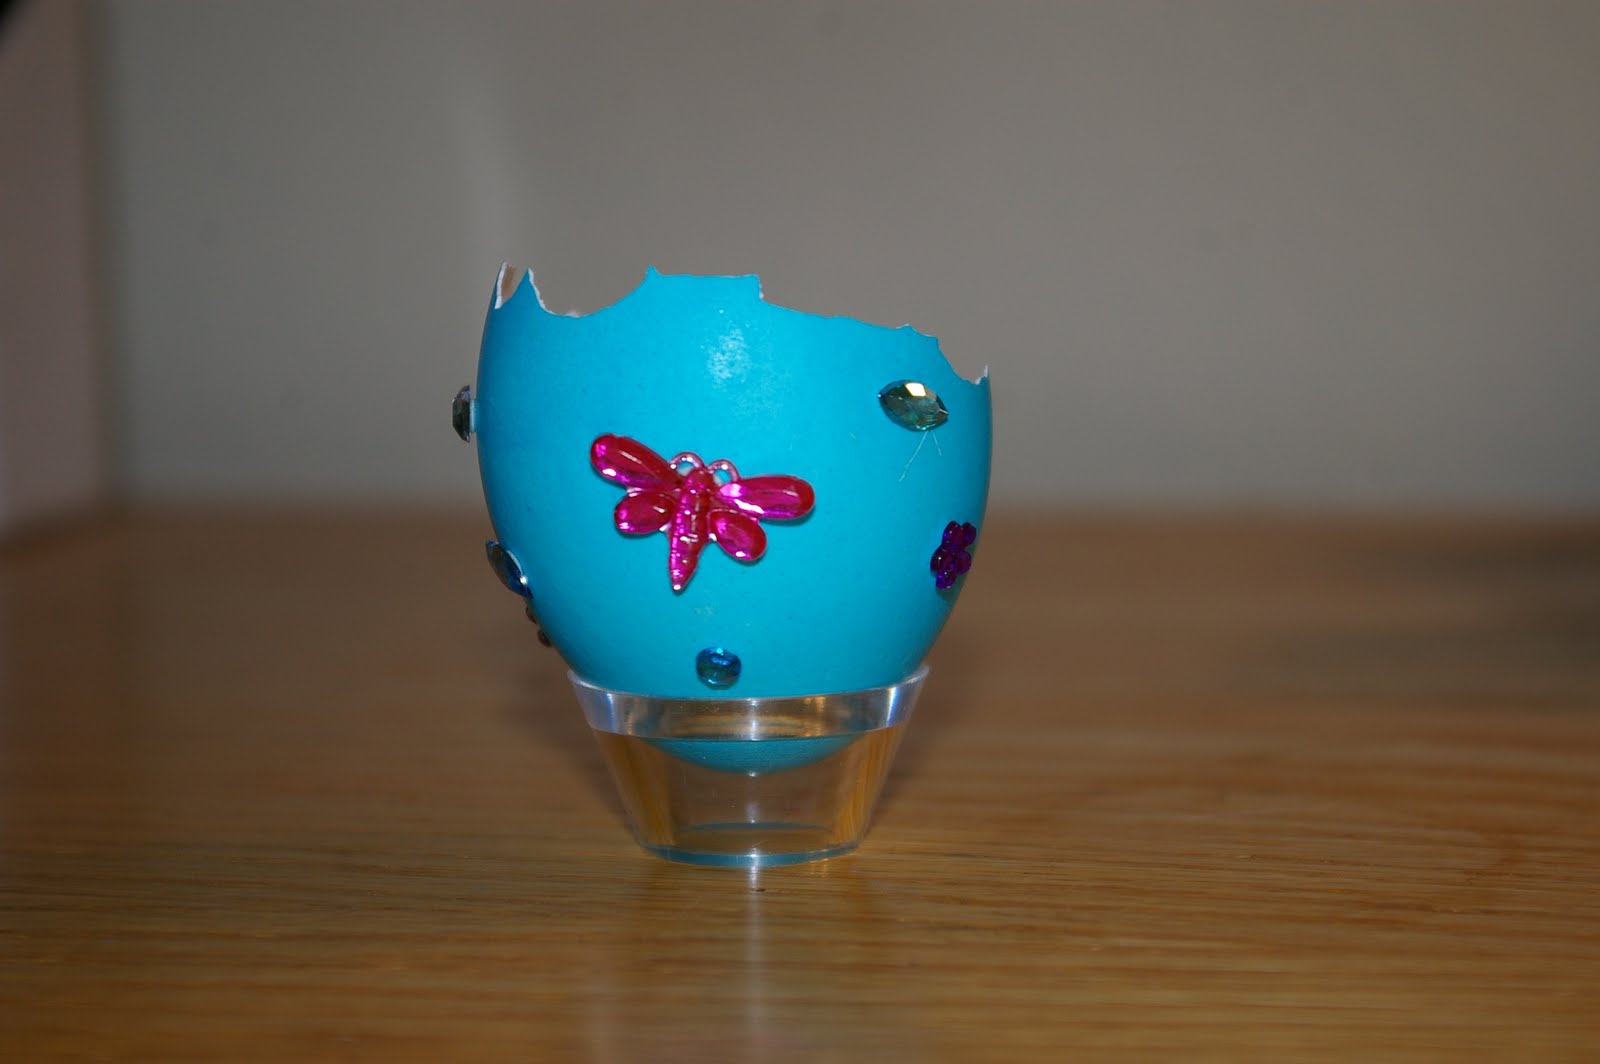
I forgot how time consuming it is, decorating these things.  Took me a couple of hours one afternoon to decorate just four of them.  I used yellow liquid food dye on this egg and loved the deep shade.  

Went a little nuts with the rhinestone strips but I just knew those crystals would look awesome against the yellow.

Here's the Santa egg, finally finished.  I painted the inside with silver glitter paint (that took 3 days to dry too, I might add)


Here's one I made for Lady Axe.  I'd gotten that red and black Jolly Roger when I won the "Talk Like A Pirate Day" Artbeads giveaway.  I painted the egg black then covered it with a thick layer of red glitter paint.  The skull piece fit perfectly against the back of the egg.  Then I glued heavy silver chain around the edge (mostly to hide my raggedly cutting job!).


A little bunny on felt grass with some candy flowers glued to it,


Including the egg with the holes drilled in it, I have completed only 5 of the dozen!  Again the big question is, what the heck am I going to do with all of these eggs?  Including all the ones I made with real shells last year!! Could I have been a Faberge' egg artist in a past life!

April 5, 2010

If At First You Don't Succeed.....

Because I refuse to be bested by a bunch of eggs!!! It's that whole "Sagittarius-Year-of-the-Dragon" stubbornness thang.


Remember the robins-egg blue whose side blew out like Mount St. Helens?

Now it holds a happy little chick, tiny silk flower and 'eggs', which are actually candy-covered sunflower seeds (and which are quite tasty too, I might add).


And the purple egg, into whose shell I plunged my finger before I even drilled the holes?

It's the Easter bunny!!
When I showed this hot pink one to Brian, he laughed and said "Is this for your bordello? I mean, it just screams "Whorehouse"..."
It doesn't quite hang straight unfortunately. I was having issues getting the ribbons to set right.
Top view.
The orange egg also had a huge crack in it, so I covered it with ribbon. I found the crystal strips in fall colours, so I used those too.
Now it's a Halloween egg.


And then there was the midnight blue egg that cracked down both sides with smudged dye.
Nothing that a little ribbon can't hide!
Now it's a celestial-themed egg!


Finally, I also used the Dudley Tie Dye kit on 4 hardboiled eggs I had in the fridge. Dudley brand dye kits have never been very good, and certainly not as good as PAAS. The technique worked so-so.
But they are still pretty and the glitter makes them all sparkly.
I still have 4 hollowed-out eggs left to decorate. But since they won't go bad, I don't have to kill myself to get them decorated. It's just nice to know that this craft project didn't conquer me, I conquered it!

March 31, 2010

The Craft That Went Horribly Awry....

A few weeks ago, I got a notification from Artbeads.com of a free egg project. The eggs looked stunning and the directions are really easy. You just dye the unboiled eggs, blow them out, decorate with self-adhesive crystals & ribbon, and voila! Gorgeous eggs abound!!
So I went to Fred Meyer and bought a couple of classic PAAS egg dye kits, because if one dye tablet is good, then 2 are better. PAAS has been an egg dying staple in American homes for generations.
And because I'm easily attracted to sparkly, colourful things, this Dudley's Tie Dye kit caught my eye and I bought that too, but I haven't used it yet.

Since Steve is out of town on spring break, he surprised Deb and I by giving us a day off this week. Hers was yesterday and mine was today. What a perfect opportunity to work on this project! I lovingly set out all my stuff - egg cups, glues, crystals, dye kits, eggs....

Step one, put 3 Tablespoons of white vinegar in each cup w/ the dye tablets.
Ooooooh! Fizzy!!!!

Once the tablets are dissolved, pour a 1/2 cup of water into each dye cup. I had to recruit some of my coffee mugs to accommodate all the colours.
Submerge the eggs, carefully, because they aren't hardboiled. It's easier to dye unblown eggs because once they are empty, they float.
The longer you leave the eggs in, the darker the dye gets.
Here's a half n half egg: Yellow and hot pink.
Puppy-helper.
Pretty, vibrant colour!!!
Now that the eggs are all dry, it's time to set up to blow out the stuff.
I ended up using an awl to poke the holes in the top and bottom of the shells. Then I carefully worked these needles inside to widen the holes. Unfortunately, the shell around the hole tended to crack. Back in the old days, we would blow the eggs with our mouths, but as that's a great way to get salmonella, I read on line that the bulb from an ear wax cleaning kit would work well.
I started with the orange egg. The shell cracked around one of the holes so I used some white glue and waited for it to dry. I got the smaller needle in and poked/stirred the yolk. Then I started using the bulb on the top hole, to blow out the stuff. Well, I squeezed a bit too hard and the egg cracked all down the side and started to pour out. Crap. Somehow I managed to keep the egg from shattering and got all the goo out. I applied a thin layer of glue on the crack line and left it to dry.

OK, let's try the dark blue egg. I got the holes made with no trouble, poked the yolk, and was much more gentle with the bulb. Things were going well, but I swear this had to be a 2-yolk egg. It wouldn't stop coming out. And was so dense that this egg cracked on the side, so I applied the glue again. But now the dye is all washed away from the cracked area. I think I can salvage them with strategically-placed ribbon.

Now I start to work on the gorgeous sky blue egg. I just start to use the bulb and the whole side of the egg blew completely out. Just like Mount St. Helens. I yelled, 'GODDAMMIT!' so loud that Brian heard me all the way downstairs and over the TV. He came up to see how it was going and couldn't believe the trouble I was having!!!

I picked up the purple egg and was holding it gently...at least I thought I was holding it gently.... and my finger goes right through the blasted shell!!! WTF?? I mean seriously!

Here's the carnage in all it's colourful glory.

I have an idea of how to use the eggs with the gaping holes. But for now, the rest have gone back into the fridge, till I can figure out a better way to get the yolk out of the shells without the sides blowing out. I know there is an egg blowing tool out there, and hopefully Michael's will have one. Aw darnsy. I have to go to the craft store! I'm all broken up about it. Kind of like the eggs.